SharpExt4, a .Net library, provides read/write Linux ext2/3/4 file system from Windows application

As a day to day Windows user, it’s not easy to access Linux file system. Windows doesn’t natively supports Linux Extended file system access.

I have been working on Linux ARM IoT device, and it’s so annoying to be back and forth between Windows working PC and Linux development PC. I regularly need to burn/flash SD card, read/write file, remove/open directory in Linux device image.

These are the findings so far:

  1. DiscUtils, is a .NET library to read and write ISO files and Virtual Machine disk files (VHD, VDI, XVA, VMDK, etc). DiscUtils also provides limited access to ext2/3/4 filesystem.
  2. Ext2Fsd is another Windows file system driver for the Ext2, Ext3, and Ext4 file systems. It allows Windows to read Linux file systems natively, providing access to the file system via a drive letter that any program can access. But it stops developing since 2017.
  3. DiskInternals Linux Reader is a freeware application from DiskInternals, developers of data recovery software. But it doesn’t have API for .Net Framework.
  4. Ext2explore is an open-source application that works similarly to DiskInternals Linux Reader—but only for Ext4, Ext3, and Ext2 partitions. It stops developing for a long time and is read only.

I decided to implement my own library. Finally, I found this, lwext4, a C library to provide ext2/3/4 filesystem for microcontrollers. According to the author, the library has some cool and unique features in microcontrollers world:

  • directory indexing – fast file find and list operations
  • extents – fast big file truncate
  • journaling transactions & recovery – power loss resistance

Lwext4 is an excellent choice for SD/MMC card, USB flash drive or any other wear leveled memory types. However it is not good for raw flash devices.

To be continue.

Next post https://www.nickdu.com/?p=896

Jira 2 Azure Devops migration tool in C#

I have been assigned a task to migrate Jira, our internal bug tracking system, to Azure DevOps cloud. There is a Jira plugin available, called TFS4JIAR, but it costs lots of money.

Here is my simple .Net C# code (if you want to use, you need modify to suit your own working environment)

Complete project can be found my github.

using Newtonsoft.Json;
using System;
using System.Collections.Generic;
using System.Net.Http;
using System.Net.Http.Headers;
using System.Text;
using System.Threading.Tasks;

namespace Jira2Azure
{
    class Program
    {
        static string JIRAIssueQuery = "http://jiraserver:8080/rest/api/latest/search?jql={0}&fields=*all";
        static string TFSBugUrl = "https://dev.azure.com/Test/SampleProject/_apis/wit/workitems/$Bug?api-version=6.0";
        static string TFSAttachmentUrl = "https://dev.azure.com/Test/SampleProject/_apis/wit/attachments?fileName={0}&api-version=6.0";

        static async Task<dynamic> JIRAGetIssues(string jql)
        {
            using (var client = new HttpClient())
            {
                //your Jira login credential
                client.DefaultRequestHeaders.Add("Authorization", "Basic XXXXXXXXXX");
                var msg = await client.GetStringAsync(string.Format(JIRAIssueQuery, jql));
                dynamic issues = JsonConvert.DeserializeObject(msg);
                return issues;
            }
        }

        static async Task JIRA2TFS(string jql)
        {
            var issues = await JIRAGetIssues(jql);
            foreach (var issue in issues.issues)
            {
                var tfs = ConvertJIRA2TFS(issue);
                await TFSCreateIssue(tfs);
            }
        }

        static async Task<dynamic> TFSUploadFile(string file, byte[] byteData)
        {
            file = Uri.EscapeUriString(file);
            using (var client = new HttpClient())
            {
                //your Azure login credential
                client.DefaultRequestHeaders.Add("Authorization", "Basic XXXXXXXXX");
                using (var content = new ByteArrayContent(byteData))
                {
                    content.Headers.ContentType = new MediaTypeHeaderValue("application/octet-stream");

                    var msg = await client.PostAsync(string.Format(TFSAttachmentUrl, file), content);
                    var responseBody = msg.Content.ReadAsStringAsync().Result;
                    return JsonConvert.DeserializeObject(responseBody);
                }
            }
        }
        static byte[] JIRADownloadFile(dynamic url)
        {
            using (var client = new HttpClient())
            {
                //your Jira login credential
                client.DefaultRequestHeaders.Add("Authorization", "Basic XXXXXXXX");
                var content = client.GetByteArrayAsync((string)url).Result;
                return content;
            }
        }
        static string ConvertJIRA2TFS(dynamic issue)
        {
            //Additional JIRA link for documentation
            string json = $"[{{\"op\": \"add\",\"path\": \"/relations/-\",\"value\": {{\"rel\": \"Hyperlink\",\"url\": \"{issue.self}\", \"attributes\": {{\"comment\": \"{issue.key}\"}}}}}},";
            if (issue.fields.attachment != null)
            {
                foreach (var attach in issue.fields.attachment)
                {
                    var content = JIRADownloadFile(attach.content);
                    var attchUrl = TFSUploadFile((string)attach.filename, content).Result;
                    var attachedJson = $"{{\"rel\":\"AttachedFile\",\"url\":\"{(string)attchUrl.url}\",\"attributes\":{{\"resourceSize\":{content.Length},\"name\":\"{(string)attach.filename}\"}}}}";
                    json += string.Format("{{\"op\":\"add\",\"path\":\"{0}\",\"from\": null,\"value\":{1}}},", "/relations/-", attachedJson);
                }
            }
            string operation = "{{\"op\":\"add\",\"path\":\"{0}\",\"from\": null,\"value\":\"{1}\"}},";
            //######### more field mapping
            var fieldMapping = new Dictionary<string, dynamic>()
            {
                { "/fields/System.Title",issue.fields.summary },
                { "/fields/Microsoft.VSTS.TCM.ReproSteps", issue.fields.description},
                { "/fields/Microsoft.VSTS.Common.Priority", issue.fields.priority.id},
            };

            foreach (var field in fieldMapping)
            {
                if (field.Value != null)
                {
                    var str = ((string)field.Value).Replace("\"", "\\\"");
                    json += string.Format(operation, field.Key, str);
                }
            }

            json = json.Replace("\r\n", "<br/>");
            json = json.TrimEnd(',');
            json += "]";
            return json;
        }

        static async Task TFSCreateIssue(string json)
        {
            using (var client = new HttpClient())
            {
                //your Azure login credential
                client.DefaultRequestHeaders.Add("Authorization", "Basic XXXXXXXXXX");
                var content = new StringContent(json, Encoding.UTF8, "application/json-patch+json");
                var msg = await client.PostAsync(TFSBugUrl, content);
            }
        }

        static async Task Main(string[] args)
        {
            await JIRA2TFS("project = TAP");
        }
    }
}

Connect a Java database via C# .Net

I am currently working on a software project that involves connecting to a Java database (Apache Derby) via a .Net C# application.  I googled a lot and nothing helps. Finally, I decided to find my own one, and managed to get it up running. Here is my solution to share:

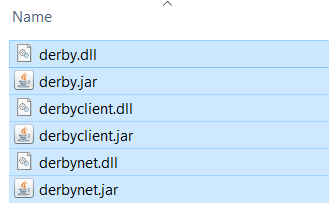
Tools we need:

using java.lang;
using java.sql;
using System;
using org.apache.derby.jdbc;

namespace DerbyDB
{
    class Program
    {
        static void Main(string[] args)
        {
            try
            {
                Class.forName("org.apache.derby.jdbc.EmbeddedDriver").newInstance();

                DriverManager.registerDriver(new EmbeddedDriver());
                var derbyDBConnection = DriverManager.getConnection("jdbc:derby:C:/DerbyDB");
                if (derbyDBConnection != null)
                {
                    Statement st = derbyDBConnection.createStatement();
                    ResultSet rs = st.executeQuery("select * from eventlog");
                    while (rs.next())
                    {
                        Console.WriteLine(rs.getInt("ID"));
                        Console.WriteLine(rs.getTime("EVENT_DATE"));
                        Console.WriteLine(rs.getString("EVENT_MESSAGE"));
                    }
                    st.close();
                    derbyDBConnection.close();
                }
            }
            catch (java.lang.Exception e)
            {
                Console.WriteLine(e);
            }
        }
    }
}

Monitor Raspberry Pi CPU&GPU temperature

This is a small script from https://www.cyberciti.biz/faq/linux-find-out-raspberry-pi-gpu-and-arm-cpu-temperature-command/ to monitor Raspberry Pi CPU&GPU temperature.

#!/bin/bash
# Script: my-pi-temp.sh
# Purpose: Display the ARM CPU and GPU  temperature of Raspberry Pi
# Author: Vivek Gite <www.cyberciti.biz> under GPL v2.x+
# -------------------------------------------------------
cpu=$(</sys/class/thermal/thermal_zone0/temp)
echo "$(date) @ $(hostname)"
echo "-------------------------------------------"
echo "GPU => $(/opt/vc/bin/vcgencmd measure_temp)"
echo "CPU => $((cpu/1000))'C"

Save and close the file. Set permission:

chmod +x my-pi-temp.sh

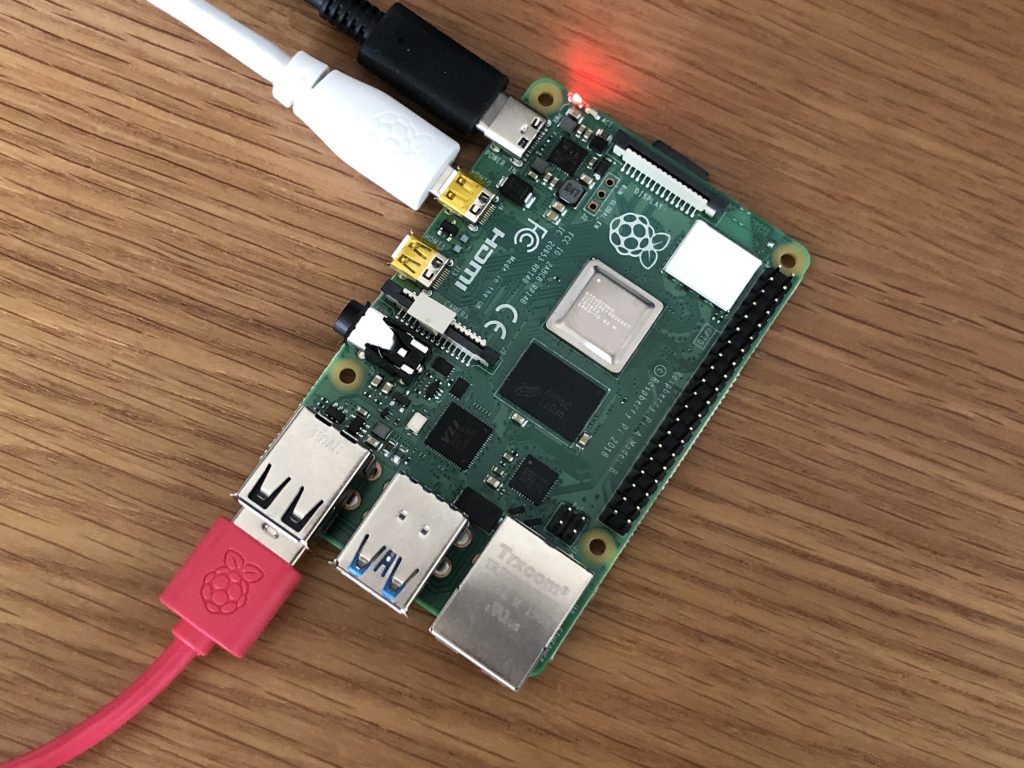
Raspberry Pi 4 setup headless

Recently, I bought a Raspberry Pi 4. It’s better for me to record all the steps to setup my Raspberry Pi headless.

  • Download Raspberry Pi OS from https://www.raspberrypi.org/software/operating-systems/
  • Burn the image to the micro SD card, I use rufus, which can be found at https://rufus.ie/
  • Write an empty text file named “ssh (no file extension) to the root of the directory of the card. 
  • Setup a Wi-Fi connection for your Raspberry Pi. Create a text file called “wpa_supplicant.conf“, and place it in the root directory of the microSD card. You will need the following text in the file.
country=US
ctrl_interface=DIR=/var/run/wpa_supplicant GROUP=netdev
update_config=1
network={
scan_ssid=1
ssid="your_wifi_ssid"
psk="your_wifi_password"
}
  • Open “config.txt” from the micro SD card root folder. Uncomment out the following code
hdmi_force_hotplug=1

hdmi_drive=2
  • Insert the micro SD card to Raspberry Pi and boot up.
  • Connecting via SSH. I use Putty, which can be downloaded from https://www.putty.org/
  • Enter “raspberrypi” or “raspberrypi.local “as the address you wish to connect to in Putty, and click Open. 
  • Enter “pi” as your username and “raspberry “as your password. 
  • Enabling and Connecting over VNC
sudo raspi-config
  • Download, install and launch VNC Viewer to connect raspberry.

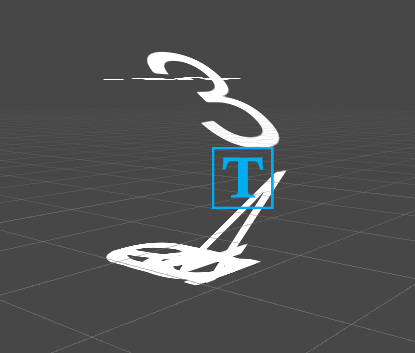
Odometer in Unity

To create a odometer in Unity is not easy. I couldn’t find a better one for my project.

Prepare all possible characters in a spinning roll and then stack them

 void Prepare()
 {
     //keep the orginal text vector for future use
     Meter.ForceMeshUpdate();
     sourceVertices = (Vector3[])Meter.textInfo.CopyMeshInfoVertexData()[0].vertices.Clone();
     Meter.textInfo.Clear();
     var templateString = string.Empty;
     foreach (var s in SpinStrip)
     {
         templateString += s + "\n";
     }

     //Update text to spinning text
     Meter.text = templateString;
     Meter.ForceMeshUpdate();
     cachedMeshInfo = Meter.textInfo.CopyMeshInfoVertexData();

     HideSpinCharacters();
     Spin(Meter.textInfo.characterInfo[currentValue], centerOfRotation, 0);
     Apply();
 }

 void HideSpinCharacters()
 {
     for (var i = 0; i < Meter.textInfo.characterCount; i++)
     {
         var charInfo = Meter.textInfo.characterInfo[i];
         if (charInfo.isVisible)
         {
             Spin(charInfo, centerOfRotation, -90);
         }
     }
 }

Spin each character one by one

...
 IEnumerator Spin(Tuple<int, int, float> param)
 {
     for (var curChar = param.Item1; curChar < param.Item2;curChar += 2)
     {
         var curCharInfo = Meter.textInfo.characterInfo[curChar];
         var nextCharInfo = Meter.textInfo.characterInfo[curChar + 2];

         for (float degree = -90; degree <= 0; degree += param.Item3)
         {
             Spin(curCharInfo, centerOfRotation, (degree + 90) < 90 ? (degree + 90) : 90);
             Spin(nextCharInfo, centerOfRotation, degree);
             Apply();
             yield return null;
         }
         yield return null;
     }
 }

void Spin(TMP_CharacterInfo charInfo, Vector3 centerOfRotation, float angleOfRotation)
 {
     // Get the index of the material used by the current character.
     int materialIndex = charInfo.materialReferenceIndex;

     // Get the index of the first vertex used by this text element.
     int vertexIndex = charInfo.vertexIndex;

     // Get the cached vertices of the mesh used by this text element (character or sprite).

     // Determine the center point of each character at the baseline.
     // Determine the center point of each character.
     Vector2 charMidBasline = (sourceVertices[0] + sourceVertices[2]) / 2;

     // Need to translate all 4 vertices of each quad to aligned with middle of character / baseline.
     // This is needed so the matrix TRS is applied at the origin for each character.
     Vector3 offset = charMidBasline;

     Vector3[] destinationVertices = Meter.textInfo.meshInfo[materialIndex].vertices;

     destinationVertices[vertexIndex + 0] = sourceVertices[0] - offset;
     destinationVertices[vertexIndex + 1] = sourceVertices[1] - offset;
     destinationVertices[vertexIndex + 2] = sourceVertices[2] - offset;
     destinationVertices[vertexIndex + 3] = sourceVertices[3] - offset;


     // This should calculate the matrix, which helps to roate odometer
     Matrix4x4 translationToCenterPoint = Matrix4x4.Translate(centerOfRotation);
     Matrix4x4 rotation = Matrix4x4.Rotate(Quaternion.AngleAxis(angleOfRotation, Vector3.right));
     Matrix4x4 translationBackToOrigin = Matrix4x4.Translate(-centerOfRotation);

     Matrix4x4 matrix = translationToCenterPoint * rotation * translationBackToOrigin;

     destinationVertices[vertexIndex + 0] = matrix.MultiplyPoint3x4(destinationVertices[vertexIndex + 0]);
     destinationVertices[vertexIndex + 1] = matrix.MultiplyPoint3x4(destinationVertices[vertexIndex + 1]);
     destinationVertices[vertexIndex + 2] = matrix.MultiplyPoint3x4(destinationVertices[vertexIndex + 2]);
     destinationVertices[vertexIndex + 3] = matrix.MultiplyPoint3x4(destinationVertices[vertexIndex + 3]);

     destinationVertices[vertexIndex + 0] += offset;
     destinationVertices[vertexIndex + 1] += offset;
     destinationVertices[vertexIndex + 2] += offset;
     destinationVertices[vertexIndex + 3] += offset;
 }
...

The complete Unity project can be found at my github.

Unity Bink player

I have been asked to play a bink video in Unity. I googled a lot and couldn’t find any solution. Then I decided to write my own one and here is my solution to integrate Bink video into Unity.

BinkNativeMethods

    internal static class BinkNativeMethods
    {
        //=======================================================================

        public const ulong BINKOLDFRAMEFORMAT = 0x00008000L; // using the old Bink frame format (internal use only)
        public const ulong BINKCUSTOMCOLORSPACE = 0x00010000L; // file contains a custom colorspace matrix (only internal now)

        public const ulong BINKNOYPLANE = 0x00000200L; // Don't decompress the Y plane (internal flag)
        public const ulong BINKWILLLOOP = 0x00000080L; // You are planning to loop this Bink.

        public const ulong BINKYCRCBNEW = 0x00000010L; // File uses the new ycrcb colorspace (usually Bink 2)
        public const ulong BINKHDR = 0x00000004L; // Video is an HDR video
        public const ulong BINK_SLICES_2 = 0x00000000L; // Bink 2 file has two slices
        public const ulong BINK_SLICES_3 = 0x00000001L; // Bink 2 file has three slices
        public const ulong BINK_SLICES_4 = 0x00000002L; // Bink 2 file has four slices
        public const ulong BINK_SLICES_8 = 0x00000003L; // Bink 2 file has eight slices
        public const ulong BINK_SLICES_MASK = 0x00000003L; // mask against openflags to get the slice flags

        [DllImport("bink2w64")]
        internal static extern void BinkClose(IntPtr Bink);

        [DllImport("bink2w64")]
        internal static extern IntPtr BinkOpen(string name, BINK_OPEN_FLAGS flags);

        [DllImport("bink2w64")]
        internal static extern string BinkGetError();

        [DllImport("bink2w64")]
        internal static extern IntPtr BinkDoFrame(IntPtr Bink);

        [DllImport("bink2w64")]
        internal static extern int BinkWait(IntPtr bink);

        [DllImport("bink2w64")]
        internal static extern void BinkNextFrame(IntPtr bink);

        [DllImport("bink2w64")]
        internal static extern int BinkCopyToBuffer(IntPtr bink, byte[] dest_addr, int dest_pitch, uint dest_height, uint dest_x, uint dest_y, BINK_COPY_FLAGS copy_flags);

        public struct BINK
        {
            public int Width;
            public int Height;
            public uint Frames;
            public uint FrameNum;
            public uint FrameRate;
            public uint FrameRateDiv;
            public uint ReadError;
            public BINK_OPEN_FLAGS OpenFlags;
            public BINKRECT FrameRects;
            public uint NumRects;
            public uint FrameChangePercent;
        };

        public struct BINKRECT
        {
            public int Left;
            public int Top;
            public int Width;
            public int Height;
        };

        public enum BINK_OPEN_FLAGS : ulong
        {
            BINKFILEOFFSET = 0x00000020L, // Use file offset specified by BinkSetFileOffset
            BINKFILEHANDLE = 0x00800000L, // Use when passing in a file handle
            BINKFROMMEMORY = 0x04000000L, // Use when passing in a pointer to the file
            BINKNOFRAMEBUFFERS = 0x00000400L, // Don't allocate internal frame buffers - application must call BinkRegisterFrameBuffers
            BINKUSETRIPLEBUFFERING = 0x00000008L, // Use triple buffering in the framebuffers
            BINKSNDTRACK = 0x00004000L, // Set the track number to play
            BINKDONTCLOSETHREADS = 0x00000040L, // Don't close threads on BinkClose (call BinkFreeGlobals to close threads)
            BINKGPU = 0x00000100L, // Open Bink in GPU mode
            BINKNOSKIP = 0x00080000L, // Don't skip frames if falling behind
            BINKPRELOADALL = 0x00002000L, // Preload the entire animation
            BINKALPHA = 0x00100000L, // Decompress alpha plane (if present)
            BINKGRAYSCALE = 0x00020000L, // Force Bink to use grayscale
            BINKFRAMERATE = 0x00001000L, // Override fr (call BinkFrameRate first)
            BINKSIMULATE = 0x00400000L, // Simulate the speed (call BinkSim first)
            BINKIOSIZE = 0x01000000L, // Set an io size (call BinkIOSize first)
            BINKNOFILLIOBUF = 0x00200000L, // Don't Fill the IO buffer (in BinkOpen and BinkCopyTo)
            BINKIOPROCESSOR = 0x02000000L, // Set an io processor (call BinkIO first)
            BINKNOTHREADEDIO = 0x08000000L // Don't use a background thread for IO
        }

        public enum BINK_COPY_FLAGS : ulong
        {
            BINKSURFACE32BGRx = 3,
            BINKSURFACE32RGBx = 4,
            BINKSURFACE32BGRA = 5,
            BINKSURFACE32RGBA = 6,
            BINKSURFACE5551 = 8,
            BINKSURFACE555 = 9,
            BINKSURFACE565 = 10,
            BINKSURFACE32ARGB = 12,
            BINKSURFACEMASK = 15,
            BINKGRAYSCALE = 0x00020000L, // Force Bink to use grayscale
            BINKNOSKIP = 0x00080000L, // Don't skip frames if falling behind
            BINKYAINVERT = 0x00000800L // Reverse Y and A planes when blitting (for debugging)
        }
    }

BinkPlayer

public class BinkPlayer : MonoBehaviour
{
    BinkNativeMethods.BINK bk;
    Texture2D texture;
    IntPtr bink;
    byte[] buffer;
    // Start is called before the first frame update
    void Start()
    {
        bink = BinkNativeMethods.BinkOpen("sample.bk2", 0);

        bk = Marshal.PtrToStructure<BinkNativeMethods.BINK>(bink);

        texture = new Texture2D(bk.Width, bk.Height, TextureFormat.RGBA32, false);
        var renderer = GetComponent<SpriteRenderer>();
        renderer.sprite = Sprite.Create(texture, new Rect(0, 0, bk.Width, bk.Height), Vector2.zero);
        buffer = new byte[bk.Width * 4 * bk.Height];
    }

    private void Update()
    {
        if (bink != IntPtr.Zero && BinkNativeMethods.BinkWait(bink) == 0)
        {
            BinkNativeMethods.BinkDoFrame(bink);
            // do you stuff here
            BinkNativeMethods.BinkCopyToBuffer(bink, buffer, bk.Width * 3, (uint)bk.Height, 0, 0, BinkNativeMethods.BINK_COPY_FLAGS.BINKSURFACE32RGBA);

            texture.LoadRawTextureData(buffer);
            texture.Apply();
            BinkNativeMethods.BinkNextFrame(bink);
        }
    }
}

The complete Unity project also can be found at my github.
Get Processor Id (CPU) in C++

This piece of C++ code helps to get CPU (Processor) Id

#include <array>
#include <iomanip>
#include <iostream>
#include <sstream>
#include <string>
#include<conio.h>
std::string GetProcessorId() {
	std::array<int, 4> cpuInfo;
	__cpuid(cpuInfo.data(), 1);
	std::ostringstream buffer;
	buffer
		<< std::uppercase << std::hex << std::setfill('0')
		<< std::setw(8) << cpuInfo.at(3)
		<< std::setw(8) << cpuInfo.at(0);
	return buffer.str();
}

int main(void) {
	std::cout << "Processor Serial number is:  ";
		std::cout<<GetProcessorId() << std::endl;
	_getch();
	return 0;
}

Scanning QR codes with C# in Unity 3D

It’s been a while since my last post. These days, I have been busy with our Unity project to integrate Unity3D graphic engine into our software eco system. An interesting sub-task is to implement a QR code scanner in our Unity project.

The ZXing.Net library did a wonderful job for me. You can download from nuget or github.

using System.Collections;
using System.Collections.Generic;
using System.Net;
using UnityEngine;
using UnityEngine.UI;
using ZXing;

public class QRScanner : MonoBehaviour
{
    WebCamTexture webcamTexture;
    string QrCode = string.Empty;
    public AudioSource beepSound;

    void Start()
    {
        var renderer = GetComponent<RawImage>();
        webcamTexture = new WebCamTexture(512, 512);
        renderer.material.mainTexture = webcamTexture;
        StartCoroutine(GetQRCode());
    }

    IEnumerator GetQRCode()
    {
        IBarcodeReader barCodeReader = new BarcodeReader();
        webcamTexture.Play();
        var snap = new Texture2D(webcamTexture.width, webcamTexture.height, TextureFormat.ARGB32, false);
        while (string.IsNullOrEmpty(QrCode))
        {
            try
            {
                snap.SetPixels32(webcamTexture.GetPixels32());
                var Result= barCodeReader.Decode(snap.GetRawTextureData(), webcamTexture.width, webcamTexture.height, RGBLuminanceSource.BitmapFormat.ARGB32);
                if (Result!= null)
                {
                    QrCode = Result.Text;
                    if (!string.IsNullOrEmpty(QrCode))
                    {
                         Debug.Log("DECODED TEXT FROM QR: " + QrCode);
                        break;
                    }
                }
            }
            catch (Exception ex) { Debug.LogWarning(ex.Message); }
            yield return null;
        }
        webcamTexture.Stop();
    }
}

I was using Unity 2019 LTS to experiment with this.

The whole project can be found at https://github.com/nickdu088/unityqrscanner