Jira 2 Azure Devops migration tool in C#

I have been assigned a task to migrate Jira, our internal bug tracking system, to Azure DevOps cloud. There is a Jira plugin available, called TFS4JIAR, but it costs lots of money.

Here is my simple .Net C# code (if you want to use, you need modify to suit your own working environment)

Complete project can be found my github.

using Newtonsoft.Json;
using System;
using System.Collections.Generic;
using System.Net.Http;
using System.Net.Http.Headers;
using System.Text;
using System.Threading.Tasks;

namespace Jira2Azure
{
    class Program
    {
        static string JIRAIssueQuery = "http://jiraserver:8080/rest/api/latest/search?jql={0}&fields=*all";
        static string TFSBugUrl = "https://dev.azure.com/Test/SampleProject/_apis/wit/workitems/$Bug?api-version=6.0";
        static string TFSAttachmentUrl = "https://dev.azure.com/Test/SampleProject/_apis/wit/attachments?fileName={0}&api-version=6.0";

        static async Task<dynamic> JIRAGetIssues(string jql)
        {
            using (var client = new HttpClient())
            {
                //your Jira login credential
                client.DefaultRequestHeaders.Add("Authorization", "Basic XXXXXXXXXX");
                var msg = await client.GetStringAsync(string.Format(JIRAIssueQuery, jql));
                dynamic issues = JsonConvert.DeserializeObject(msg);
                return issues;
            }
        }

        static async Task JIRA2TFS(string jql)
        {
            var issues = await JIRAGetIssues(jql);
            foreach (var issue in issues.issues)
            {
                var tfs = ConvertJIRA2TFS(issue);
                await TFSCreateIssue(tfs);
            }
        }

        static async Task<dynamic> TFSUploadFile(string file, byte[] byteData)
        {
            file = Uri.EscapeUriString(file);
            using (var client = new HttpClient())
            {
                //your Azure login credential
                client.DefaultRequestHeaders.Add("Authorization", "Basic XXXXXXXXX");
                using (var content = new ByteArrayContent(byteData))
                {
                    content.Headers.ContentType = new MediaTypeHeaderValue("application/octet-stream");

                    var msg = await client.PostAsync(string.Format(TFSAttachmentUrl, file), content);
                    var responseBody = msg.Content.ReadAsStringAsync().Result;
                    return JsonConvert.DeserializeObject(responseBody);
                }
            }
        }
        static byte[] JIRADownloadFile(dynamic url)
        {
            using (var client = new HttpClient())
            {
                //your Jira login credential
                client.DefaultRequestHeaders.Add("Authorization", "Basic XXXXXXXX");
                var content = client.GetByteArrayAsync((string)url).Result;
                return content;
            }
        }
        static string ConvertJIRA2TFS(dynamic issue)
        {
            //Additional JIRA link for documentation
            string json = $"[{{\"op\": \"add\",\"path\": \"/relations/-\",\"value\": {{\"rel\": \"Hyperlink\",\"url\": \"{issue.self}\", \"attributes\": {{\"comment\": \"{issue.key}\"}}}}}},";
            if (issue.fields.attachment != null)
            {
                foreach (var attach in issue.fields.attachment)
                {
                    var content = JIRADownloadFile(attach.content);
                    var attchUrl = TFSUploadFile((string)attach.filename, content).Result;
                    var attachedJson = $"{{\"rel\":\"AttachedFile\",\"url\":\"{(string)attchUrl.url}\",\"attributes\":{{\"resourceSize\":{content.Length},\"name\":\"{(string)attach.filename}\"}}}}";
                    json += string.Format("{{\"op\":\"add\",\"path\":\"{0}\",\"from\": null,\"value\":{1}}},", "/relations/-", attachedJson);
                }
            }
            string operation = "{{\"op\":\"add\",\"path\":\"{0}\",\"from\": null,\"value\":\"{1}\"}},";
            //######### more field mapping
            var fieldMapping = new Dictionary<string, dynamic>()
            {
                { "/fields/System.Title",issue.fields.summary },
                { "/fields/Microsoft.VSTS.TCM.ReproSteps", issue.fields.description},
                { "/fields/Microsoft.VSTS.Common.Priority", issue.fields.priority.id},
            };

            foreach (var field in fieldMapping)
            {
                if (field.Value != null)
                {
                    var str = ((string)field.Value).Replace("\"", "\\\"");
                    json += string.Format(operation, field.Key, str);
                }
            }

            json = json.Replace("\r\n", "<br/>");
            json = json.TrimEnd(',');
            json += "]";
            return json;
        }

        static async Task TFSCreateIssue(string json)
        {
            using (var client = new HttpClient())
            {
                //your Azure login credential
                client.DefaultRequestHeaders.Add("Authorization", "Basic XXXXXXXXXX");
                var content = new StringContent(json, Encoding.UTF8, "application/json-patch+json");
                var msg = await client.PostAsync(TFSBugUrl, content);
            }
        }

        static async Task Main(string[] args)
        {
            await JIRA2TFS("project = TAP");
        }
    }
}

Connect a Java database via C# .Net

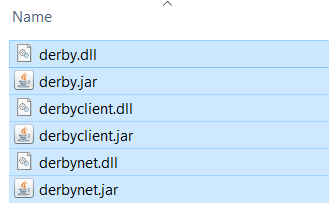
I am currently working on a software project that involves connecting to a Java database (Apache Derby) via a .Net C# application.  I googled a lot and nothing helps. Finally, I decided to find my own one, and managed to get it up running. Here is my solution to share:

Tools we need:

using java.lang;
using java.sql;
using System;
using org.apache.derby.jdbc;

namespace DerbyDB
{
    class Program
    {
        static void Main(string[] args)
        {
            try
            {
                Class.forName("org.apache.derby.jdbc.EmbeddedDriver").newInstance();

                DriverManager.registerDriver(new EmbeddedDriver());
                var derbyDBConnection = DriverManager.getConnection("jdbc:derby:C:/DerbyDB");
                if (derbyDBConnection != null)
                {
                    Statement st = derbyDBConnection.createStatement();
                    ResultSet rs = st.executeQuery("select * from eventlog");
                    while (rs.next())
                    {
                        Console.WriteLine(rs.getInt("ID"));
                        Console.WriteLine(rs.getTime("EVENT_DATE"));
                        Console.WriteLine(rs.getString("EVENT_MESSAGE"));
                    }
                    st.close();
                    derbyDBConnection.close();
                }
            }
            catch (java.lang.Exception e)
            {
                Console.WriteLine(e);
            }
        }
    }
}

Access NAS from Raspberry Pi

I have a NAS, and it can be easily access from Raspberry Pi by using the following script:

  • Create a NAS folder
mkdir nas
  • mount NAS to the local nas folder
sudo mount -t cifs //lenovoez/documents /home/pi/nas/

Monitor Raspberry Pi CPU&GPU temperature

This is a small script from https://www.cyberciti.biz/faq/linux-find-out-raspberry-pi-gpu-and-arm-cpu-temperature-command/ to monitor Raspberry Pi CPU&GPU temperature.

#!/bin/bash
# Script: my-pi-temp.sh
# Purpose: Display the ARM CPU and GPU  temperature of Raspberry Pi
# Author: Vivek Gite <www.cyberciti.biz> under GPL v2.x+
# -------------------------------------------------------
cpu=$(</sys/class/thermal/thermal_zone0/temp)
echo "$(date) @ $(hostname)"
echo "-------------------------------------------"
echo "GPU => $(/opt/vc/bin/vcgencmd measure_temp)"
echo "CPU => $((cpu/1000))'C"

Save and close the file. Set permission:

chmod +x my-pi-temp.sh

Raspberry Pi 4 setup headless

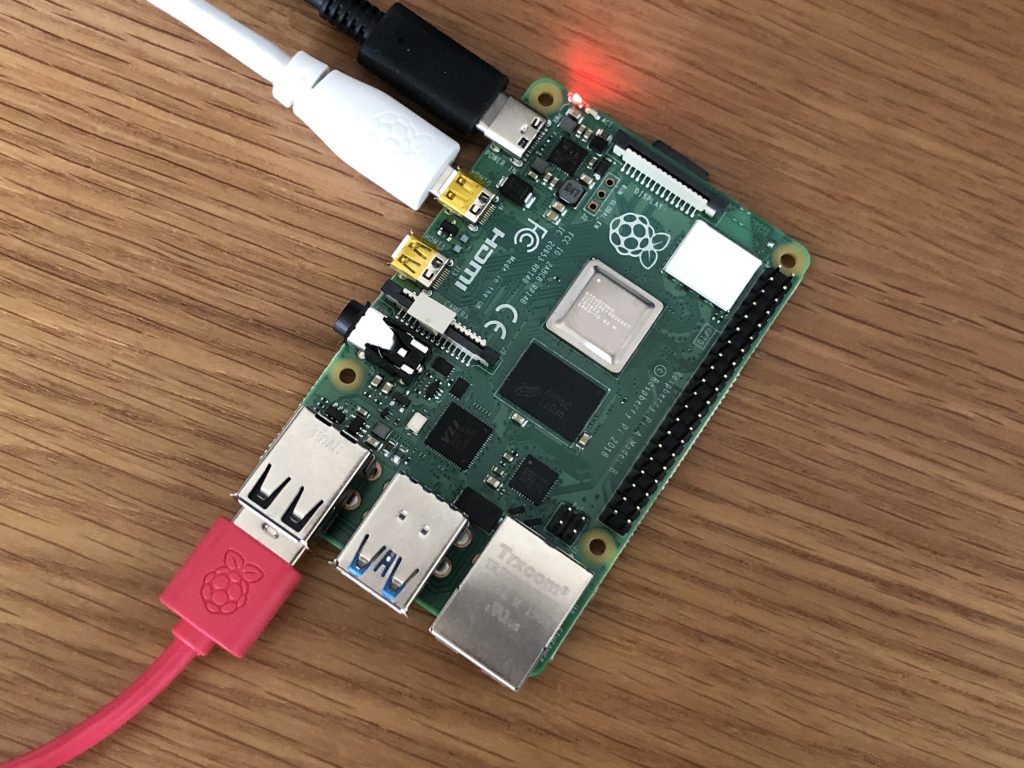
Recently, I bought a Raspberry Pi 4. It’s better for me to record all the steps to setup my Raspberry Pi headless.

  • Download Raspberry Pi OS from https://www.raspberrypi.org/software/operating-systems/
  • Burn the image to the micro SD card, I use rufus, which can be found at https://rufus.ie/
  • Write an empty text file named “ssh (no file extension) to the root of the directory of the card. 
  • Setup a Wi-Fi connection for your Raspberry Pi. Create a text file called “wpa_supplicant.conf“, and place it in the root directory of the microSD card. You will need the following text in the file.
country=US
ctrl_interface=DIR=/var/run/wpa_supplicant GROUP=netdev
update_config=1
network={
scan_ssid=1
ssid="your_wifi_ssid"
psk="your_wifi_password"
}
  • Open “config.txt” from the micro SD card root folder. Uncomment out the following code
hdmi_force_hotplug=1

hdmi_drive=2
  • Insert the micro SD card to Raspberry Pi and boot up.
  • Connecting via SSH. I use Putty, which can be downloaded from https://www.putty.org/
  • Enter “raspberrypi” or “raspberrypi.local “as the address you wish to connect to in Putty, and click Open. 
  • Enter “pi” as your username and “raspberry “as your password. 
  • Enabling and Connecting over VNC
sudo raspi-config
  • Download, install and launch VNC Viewer to connect raspberry.

Odometer in Unity

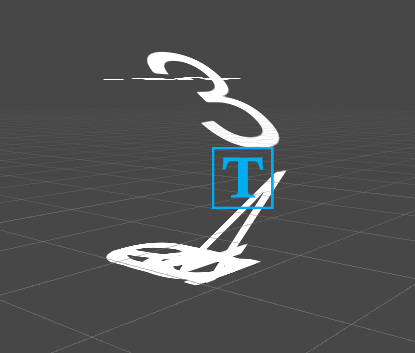
To create a odometer in Unity is not easy. I couldn’t find a better one for my project.

Prepare all possible characters in a spinning roll and then stack them

 void Prepare()
 {
     //keep the orginal text vector for future use
     Meter.ForceMeshUpdate();
     sourceVertices = (Vector3[])Meter.textInfo.CopyMeshInfoVertexData()[0].vertices.Clone();
     Meter.textInfo.Clear();
     var templateString = string.Empty;
     foreach (var s in SpinStrip)
     {
         templateString += s + "\n";
     }

     //Update text to spinning text
     Meter.text = templateString;
     Meter.ForceMeshUpdate();
     cachedMeshInfo = Meter.textInfo.CopyMeshInfoVertexData();

     HideSpinCharacters();
     Spin(Meter.textInfo.characterInfo[currentValue], centerOfRotation, 0);
     Apply();
 }

 void HideSpinCharacters()
 {
     for (var i = 0; i < Meter.textInfo.characterCount; i++)
     {
         var charInfo = Meter.textInfo.characterInfo[i];
         if (charInfo.isVisible)
         {
             Spin(charInfo, centerOfRotation, -90);
         }
     }
 }

Spin each character one by one

...
 IEnumerator Spin(Tuple<int, int, float> param)
 {
     for (var curChar = param.Item1; curChar < param.Item2;curChar += 2)
     {
         var curCharInfo = Meter.textInfo.characterInfo[curChar];
         var nextCharInfo = Meter.textInfo.characterInfo[curChar + 2];

         for (float degree = -90; degree <= 0; degree += param.Item3)
         {
             Spin(curCharInfo, centerOfRotation, (degree + 90) < 90 ? (degree + 90) : 90);
             Spin(nextCharInfo, centerOfRotation, degree);
             Apply();
             yield return null;
         }
         yield return null;
     }
 }

void Spin(TMP_CharacterInfo charInfo, Vector3 centerOfRotation, float angleOfRotation)
 {
     // Get the index of the material used by the current character.
     int materialIndex = charInfo.materialReferenceIndex;

     // Get the index of the first vertex used by this text element.
     int vertexIndex = charInfo.vertexIndex;

     // Get the cached vertices of the mesh used by this text element (character or sprite).

     // Determine the center point of each character at the baseline.
     // Determine the center point of each character.
     Vector2 charMidBasline = (sourceVertices[0] + sourceVertices[2]) / 2;

     // Need to translate all 4 vertices of each quad to aligned with middle of character / baseline.
     // This is needed so the matrix TRS is applied at the origin for each character.
     Vector3 offset = charMidBasline;

     Vector3[] destinationVertices = Meter.textInfo.meshInfo[materialIndex].vertices;

     destinationVertices[vertexIndex + 0] = sourceVertices[0] - offset;
     destinationVertices[vertexIndex + 1] = sourceVertices[1] - offset;
     destinationVertices[vertexIndex + 2] = sourceVertices[2] - offset;
     destinationVertices[vertexIndex + 3] = sourceVertices[3] - offset;


     // This should calculate the matrix, which helps to roate odometer
     Matrix4x4 translationToCenterPoint = Matrix4x4.Translate(centerOfRotation);
     Matrix4x4 rotation = Matrix4x4.Rotate(Quaternion.AngleAxis(angleOfRotation, Vector3.right));
     Matrix4x4 translationBackToOrigin = Matrix4x4.Translate(-centerOfRotation);

     Matrix4x4 matrix = translationToCenterPoint * rotation * translationBackToOrigin;

     destinationVertices[vertexIndex + 0] = matrix.MultiplyPoint3x4(destinationVertices[vertexIndex + 0]);
     destinationVertices[vertexIndex + 1] = matrix.MultiplyPoint3x4(destinationVertices[vertexIndex + 1]);
     destinationVertices[vertexIndex + 2] = matrix.MultiplyPoint3x4(destinationVertices[vertexIndex + 2]);
     destinationVertices[vertexIndex + 3] = matrix.MultiplyPoint3x4(destinationVertices[vertexIndex + 3]);

     destinationVertices[vertexIndex + 0] += offset;
     destinationVertices[vertexIndex + 1] += offset;
     destinationVertices[vertexIndex + 2] += offset;
     destinationVertices[vertexIndex + 3] += offset;
 }
...

The complete Unity project can be found at my github.

Unity Bink player

I have been asked to play a bink video in Unity. I googled a lot and couldn’t find any solution. Then I decided to write my own one and here is my solution to integrate Bink video into Unity.

BinkNativeMethods

    internal static class BinkNativeMethods
    {
        //=======================================================================

        public const ulong BINKOLDFRAMEFORMAT = 0x00008000L; // using the old Bink frame format (internal use only)
        public const ulong BINKCUSTOMCOLORSPACE = 0x00010000L; // file contains a custom colorspace matrix (only internal now)

        public const ulong BINKNOYPLANE = 0x00000200L; // Don't decompress the Y plane (internal flag)
        public const ulong BINKWILLLOOP = 0x00000080L; // You are planning to loop this Bink.

        public const ulong BINKYCRCBNEW = 0x00000010L; // File uses the new ycrcb colorspace (usually Bink 2)
        public const ulong BINKHDR = 0x00000004L; // Video is an HDR video
        public const ulong BINK_SLICES_2 = 0x00000000L; // Bink 2 file has two slices
        public const ulong BINK_SLICES_3 = 0x00000001L; // Bink 2 file has three slices
        public const ulong BINK_SLICES_4 = 0x00000002L; // Bink 2 file has four slices
        public const ulong BINK_SLICES_8 = 0x00000003L; // Bink 2 file has eight slices
        public const ulong BINK_SLICES_MASK = 0x00000003L; // mask against openflags to get the slice flags

        [DllImport("bink2w64")]
        internal static extern void BinkClose(IntPtr Bink);

        [DllImport("bink2w64")]
        internal static extern IntPtr BinkOpen(string name, BINK_OPEN_FLAGS flags);

        [DllImport("bink2w64")]
        internal static extern string BinkGetError();

        [DllImport("bink2w64")]
        internal static extern IntPtr BinkDoFrame(IntPtr Bink);

        [DllImport("bink2w64")]
        internal static extern int BinkWait(IntPtr bink);

        [DllImport("bink2w64")]
        internal static extern void BinkNextFrame(IntPtr bink);

        [DllImport("bink2w64")]
        internal static extern int BinkCopyToBuffer(IntPtr bink, byte[] dest_addr, int dest_pitch, uint dest_height, uint dest_x, uint dest_y, BINK_COPY_FLAGS copy_flags);

        public struct BINK
        {
            public int Width;
            public int Height;
            public uint Frames;
            public uint FrameNum;
            public uint FrameRate;
            public uint FrameRateDiv;
            public uint ReadError;
            public BINK_OPEN_FLAGS OpenFlags;
            public BINKRECT FrameRects;
            public uint NumRects;
            public uint FrameChangePercent;
        };

        public struct BINKRECT
        {
            public int Left;
            public int Top;
            public int Width;
            public int Height;
        };

        public enum BINK_OPEN_FLAGS : ulong
        {
            BINKFILEOFFSET = 0x00000020L, // Use file offset specified by BinkSetFileOffset
            BINKFILEHANDLE = 0x00800000L, // Use when passing in a file handle
            BINKFROMMEMORY = 0x04000000L, // Use when passing in a pointer to the file
            BINKNOFRAMEBUFFERS = 0x00000400L, // Don't allocate internal frame buffers - application must call BinkRegisterFrameBuffers
            BINKUSETRIPLEBUFFERING = 0x00000008L, // Use triple buffering in the framebuffers
            BINKSNDTRACK = 0x00004000L, // Set the track number to play
            BINKDONTCLOSETHREADS = 0x00000040L, // Don't close threads on BinkClose (call BinkFreeGlobals to close threads)
            BINKGPU = 0x00000100L, // Open Bink in GPU mode
            BINKNOSKIP = 0x00080000L, // Don't skip frames if falling behind
            BINKPRELOADALL = 0x00002000L, // Preload the entire animation
            BINKALPHA = 0x00100000L, // Decompress alpha plane (if present)
            BINKGRAYSCALE = 0x00020000L, // Force Bink to use grayscale
            BINKFRAMERATE = 0x00001000L, // Override fr (call BinkFrameRate first)
            BINKSIMULATE = 0x00400000L, // Simulate the speed (call BinkSim first)
            BINKIOSIZE = 0x01000000L, // Set an io size (call BinkIOSize first)
            BINKNOFILLIOBUF = 0x00200000L, // Don't Fill the IO buffer (in BinkOpen and BinkCopyTo)
            BINKIOPROCESSOR = 0x02000000L, // Set an io processor (call BinkIO first)
            BINKNOTHREADEDIO = 0x08000000L // Don't use a background thread for IO
        }

        public enum BINK_COPY_FLAGS : ulong
        {
            BINKSURFACE32BGRx = 3,
            BINKSURFACE32RGBx = 4,
            BINKSURFACE32BGRA = 5,
            BINKSURFACE32RGBA = 6,
            BINKSURFACE5551 = 8,
            BINKSURFACE555 = 9,
            BINKSURFACE565 = 10,
            BINKSURFACE32ARGB = 12,
            BINKSURFACEMASK = 15,
            BINKGRAYSCALE = 0x00020000L, // Force Bink to use grayscale
            BINKNOSKIP = 0x00080000L, // Don't skip frames if falling behind
            BINKYAINVERT = 0x00000800L // Reverse Y and A planes when blitting (for debugging)
        }
    }

BinkPlayer

public class BinkPlayer : MonoBehaviour
{
    BinkNativeMethods.BINK bk;
    Texture2D texture;
    IntPtr bink;
    byte[] buffer;
    // Start is called before the first frame update
    void Start()
    {
        bink = BinkNativeMethods.BinkOpen("sample.bk2", 0);

        bk = Marshal.PtrToStructure<BinkNativeMethods.BINK>(bink);

        texture = new Texture2D(bk.Width, bk.Height, TextureFormat.RGBA32, false);
        var renderer = GetComponent<SpriteRenderer>();
        renderer.sprite = Sprite.Create(texture, new Rect(0, 0, bk.Width, bk.Height), Vector2.zero);
        buffer = new byte[bk.Width * 4 * bk.Height];
    }

    private void Update()
    {
        if (bink != IntPtr.Zero && BinkNativeMethods.BinkWait(bink) == 0)
        {
            BinkNativeMethods.BinkDoFrame(bink);
            // do you stuff here
            BinkNativeMethods.BinkCopyToBuffer(bink, buffer, bk.Width * 3, (uint)bk.Height, 0, 0, BinkNativeMethods.BINK_COPY_FLAGS.BINKSURFACE32RGBA);

            texture.LoadRawTextureData(buffer);
            texture.Apply();
            BinkNativeMethods.BinkNextFrame(bink);
        }
    }
}

The complete Unity project also can be found at my github.
Get Processor Id (CPU) in C++

This piece of C++ code helps to get CPU (Processor) Id

#include <array>
#include <iomanip>
#include <iostream>
#include <sstream>
#include <string>
#include<conio.h>
std::string GetProcessorId() {
	std::array<int, 4> cpuInfo;
	__cpuid(cpuInfo.data(), 1);
	std::ostringstream buffer;
	buffer
		<< std::uppercase << std::hex << std::setfill('0')
		<< std::setw(8) << cpuInfo.at(3)
		<< std::setw(8) << cpuInfo.at(0);
	return buffer.str();
}

int main(void) {
	std::cout << "Processor Serial number is:  ";
		std::cout<<GetProcessorId() << std::endl;
	_getch();
	return 0;
}

Scanning QR codes with C# in Unity 3D

It’s been a while since my last post. These days, I have been busy with our Unity project to integrate Unity3D graphic engine into our software eco system. An interesting sub-task is to implement a QR code scanner in our Unity project.

The ZXing.Net library did a wonderful job for me. You can download from nuget or github.

using System.Collections;
using System.Collections.Generic;
using System.Net;
using UnityEngine;
using UnityEngine.UI;
using ZXing;

public class QRScanner : MonoBehaviour
{
    WebCamTexture webcamTexture;
    string QrCode = string.Empty;
    public AudioSource beepSound;

    void Start()
    {
        var renderer = GetComponent<RawImage>();
        webcamTexture = new WebCamTexture(512, 512);
        renderer.material.mainTexture = webcamTexture;
        StartCoroutine(GetQRCode());
    }

    IEnumerator GetQRCode()
    {
        IBarcodeReader barCodeReader = new BarcodeReader();
        webcamTexture.Play();
        var snap = new Texture2D(webcamTexture.width, webcamTexture.height, TextureFormat.ARGB32, false);
        while (string.IsNullOrEmpty(QrCode))
        {
            try
            {
                snap.SetPixels32(webcamTexture.GetPixels32());
                var Result= barCodeReader.Decode(snap.GetRawTextureData(), webcamTexture.width, webcamTexture.height, RGBLuminanceSource.BitmapFormat.ARGB32);
                if (Result!= null)
                {
                    QrCode = Result.Text;
                    if (!string.IsNullOrEmpty(QrCode))
                    {
                         Debug.Log("DECODED TEXT FROM QR: " + QrCode);
                        break;
                    }
                }
            }
            catch (Exception ex) { Debug.LogWarning(ex.Message); }
            yield return null;
        }
        webcamTexture.Stop();
    }
}

I was using Unity 2019 LTS to experiment with this.

The whole project can be found at https://github.com/nickdu088/unityqrscanner

Learning OpenCL programming

This post is to record the steps how I run my first “Hello World” OpenCL C++ program.

  1. To make things easier, I created this, OpenCL.zip, OpenCL library and C/C++ header files.
  2. Create a Visual Studio C++ project
  3. The following code is to add two 2^25 array altogether using GPU:
#include <iostream>
#include <vector>
#include <string>
using namespace std;

#define __CL_ENABLE_EXCEPTIONS
#include <CL\cl.hpp>

// Compute c = a + b.
static const char source[] =
"kernel void add(\n"
"       ulong n,\n"
"       global const float *a,\n"
"       global const float *b,\n"
"       global float *c\n"
"       )\n"
"{\n"
"    size_t i = get_global_id(0);\n"
"    if (i < n) {\n"
"       c[i] = a[i] + b[i];\n"
"    }\n"
"}\n";

int main() {

	const size_t N = 1 << 25;

	try {
		// Get list of OpenCL platforms.
		std::vector platform;
		cl::Platform::get(&platform);

		if (platform.empty()) {
			std::cerr << "OpenCL platforms not found." << std::endl;
			return 1;
		}

		// Get first available GPU device.
		cl::Context context;
		std::vector device;
		for (auto p = platform.begin(); device.empty() && p != platform.end(); p++) {
			std::vector pldev;

			try {
				p->getDevices(CL_DEVICE_TYPE_DEFAULT, &pldev);

				for (auto d = pldev.begin(); device.empty() && d != pldev.end(); d++) {
					if (!d->getInfo()) continue;

					std::string ext = d->getInfo();

					device.push_back(*d);
					context = cl::Context(device);
				}
			}
			catch (...) {
				device.clear();
			}
		}

		if (device.empty()) {
			std::cerr << "GPUs device not found." << std::endl;
			return 1;
		}

		std::cout << device[0].getInfo() << std::endl;

		// Create command queue.
		cl::CommandQueue queue(context, device[0]);

		// Compile OpenCL program for found device.
		cl::Program program(context, cl::Program::Sources(
			1, std::make_pair(source, strlen(source))
			));

		try {
			program.build(device);
		}
		catch (const cl::Error&) {
			std::cerr
				<< "OpenCL compilation error" << std::endl
				<< program.getBuildInfo(device[0])
				<< std::endl;
			return 1;
		}

		cl::Kernel add(program, "add");

		// Prepare input data.
		std::vector a(N, 1);
		std::vector b(N, 2);
		std::vector c(N);

		// Allocate device buffers and transfer input data to device.
		cl::Buffer A(context, CL_MEM_READ_ONLY | CL_MEM_COPY_HOST_PTR,
			a.size() * sizeof(float), a.data());

		cl::Buffer B(context, CL_MEM_READ_ONLY | CL_MEM_COPY_HOST_PTR,
			b.size() * sizeof(float), b.data());

		cl::Buffer C(context, CL_MEM_READ_WRITE,
			c.size() * sizeof(float));

		// Set kernel parameters.
		add.setArg(0, static_cast(N));
		add.setArg(1, A);
		add.setArg(2, B);
		add.setArg(3, C);

		// Launch kernel on the compute device.
		queue.enqueueNDRangeKernel(add, cl::NullRange, N, cl::NullRange);

		// Get result back to host.
		queue.enqueueReadBuffer(C, CL_TRUE, 0, c.size() * sizeof(float), c.data());

		// Should get '3' here.
		std::cout << c[42] << std::endl;
	}
	catch (const cl::Error &err) {
		std::cerr
			<< "OpenCL error: "
			<< err.what() << "(" << err.err() << ")"
			<< std::endl;
		return 1;
	}
}